Last Updated on May 3, 2024
How to Use Soil Blocks for Seed Starting – Gardening Tips and Tricks
Welcome to our latest blog post featuring where Tim shares his expertise on how to use soil blocks for seed starting. This method is perfect for those looking to start plants stronger with less waste. Plus, we’ve got a fantastic video at the top of this post for a more visual guide. Don’t forget to check it out!
What Are Soil Blocks?
Soil blocking is an ingenious method of starting seeds that leads to the production of vigorous seedlings. The unique advantage of this method is that each seedling is nurtured within its own undisturbed root ball. This results in the seedlings quickly and efficiently establishing themselves in their new environment after transplanting. In contrast to seedlings grown in containers, whose roots tend to encircle the inner surface of their container, the roots of seedlings grown in soil blocks naturally air prune themselves. This encourages them to extend immediately into their new surroundings upon transplanting, which significantly reduces transplant shock. Additionally, this method simplifies gardening tasks by eliminating the need to wash and reuse past cell packs each year, making for less cleanup and a more sustainable gardening practice.
Getting Started: How to Use Soil Blocks for Seed Starting
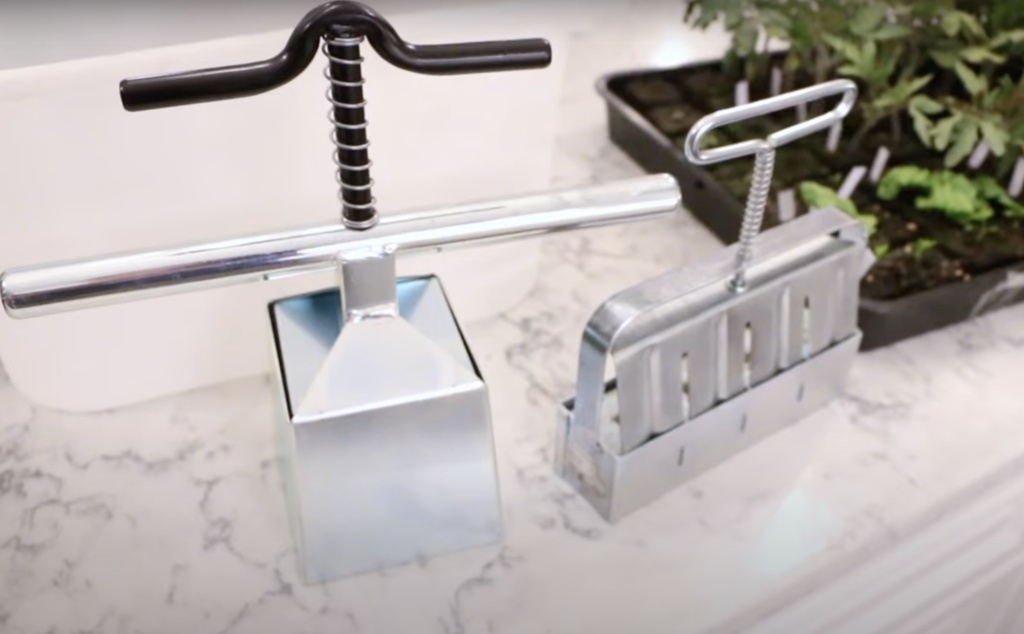
To begin, you’ll need a soil blocking tool. Tim recommends the two-inch soil blocks for starting seedlings, which makes four blocks at once. Though the initial investment might seem a bit high, it’s built to last a lifetime. For those looking to up pot, a four-inch blocking tool is also available. Additionally, you’ll need a bucket for mixing the soil and sturdy trays for holding the blocks.
- Micro Ladbrooke Soil Block Maker
- 2-Inch Ladbrooke Soil Block Maker
- 4-inch Ladbrooke Soil Block Maker
- Genuine Ladbrooke 6-Pc. “Master Grower” Soil Blocker Set
The Perfect Soil Mix Recipe
The recipe for the soil mix, which has been found to work best for successful soil blocking, includes the following key ingredients:
- 1 Part Peat Moss: This component adds structure and helps with water retention, ensuring that the soil blocks maintain their shape while providing enough moisture for seed germination and growth. (find it here on Amazon)
- 1 Part Coast of Maine Compost Blend: This provides essential nutrients to the soil, promoting healthy and robust growth of the seedlings. (find it here on Amazon)
- 1/2 Part Vermiculite: Used in a smaller proportion (half part), vermiculite aids in moisture retention and aeration of the soil, creating an optimal environment for root development. (find it here on Amazon)
- A Small Amount of Blood Meal: A small amount is added as a source of nitrogen, which is crucial for the healthy growth of plants. Nitrogen helps in leaf and stem development, making it an essential part of the soil mix recipe. (find it here on Amazon)
This carefully balanced mixture ensures that the soil blocks have the right combination of nutrients, structure, and moisture, creating an ideal environment for starting seeds and nurturing young plants.
When making the mix, make sure it has plenty of moisture.
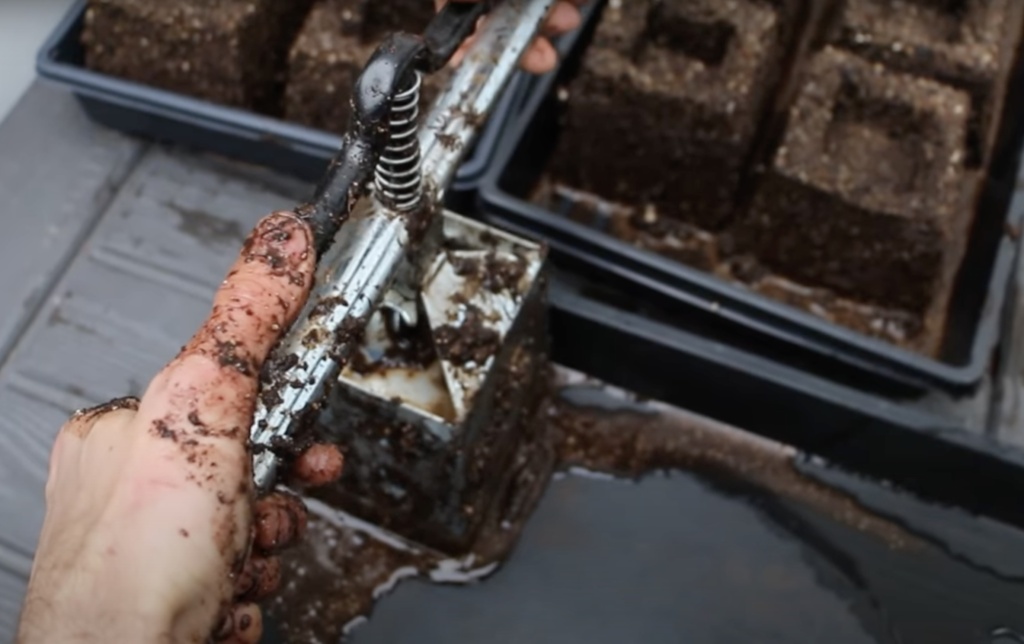
Making the Soil Blocks
The process is similar to making a sand castle. Ensure that you push the soil into the top of the block maker for well-formed blocks. When you push down into the mix with the block maker, you should see water push through the tops of the block maker.
Use sturdy trays as soil blocks are heavier than normal cell packs.
Adding the Seeds into the Soil Block
The block maker makes a small divot in the two-inch blocks to place the seeds. Cover the seeds with fine vermiculite then spray the tops of the blocks with water. The vermiculite will keep the seeds moist.
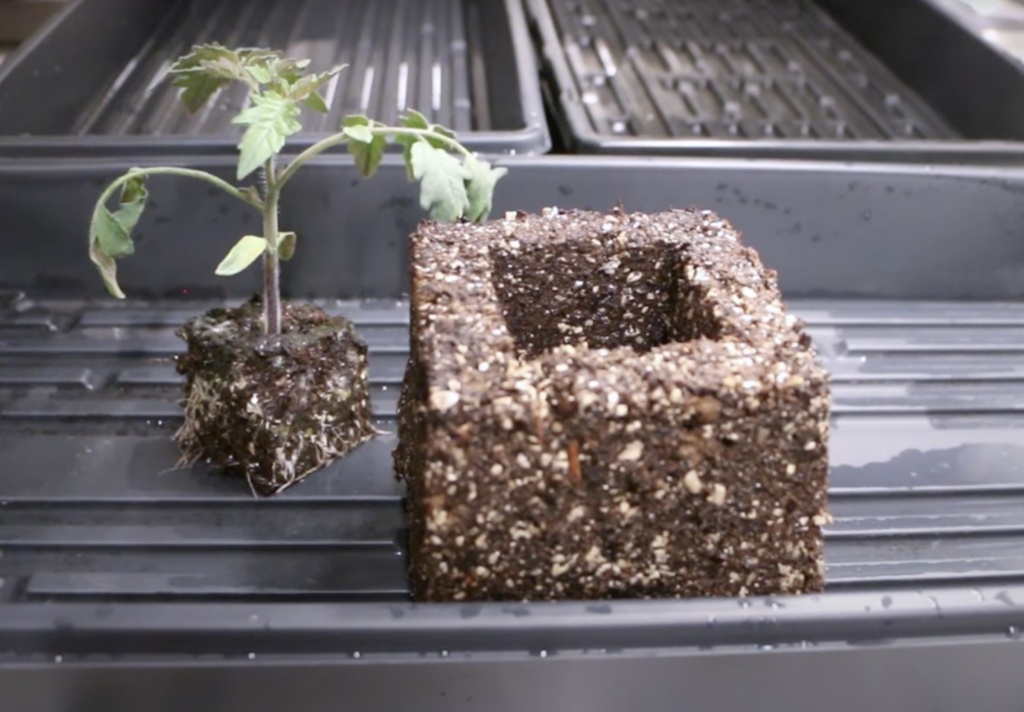
Up-Potting with Soil Blocks: Transitioning from 2-Inch to 4-Inch Blocks
To start your seedlings, the two-inch soil blocks are perfect, and Tim’s tool of choice makes four blocks at a time. These smaller blocks are ideal for initiating the growth of various plants, including tomatoes. As your plants grow, particularly tomato plants, you can easily transition them into larger spaces for continued growth.
This is where the four-inch soil blocks come into play. The design of these larger blocks is specifically intended to accommodate the two-inch blocks. This feature allows for a seamless “up-potting” process. You can transfer your tomato plants, initially grown in the two-inch blocks, directly into the four-inch blocks. This not only facilitates a smooth transition for the plants but also ensures they have adequate space to flourish as they mature. The four-inch soil blocks, therefore, play a crucial role in the growth cycle of your plants, especially for those that benefit from a larger growing space, like tomatoes.
Tips for Maintaining Soil Blocks
It’s essential to keep your soil blocks moist and well-hydrated for the healthy growth of your seedlings. Water them daily or every other day, adding about an inch of water into the tray. The soil blocks will absorb this water, ensuring that your seedlings have a consistent moisture level.
Transplanting Soil Block Seedlings into the Garden
Transplanting your seedlings from soil blocks into the garden is straightforward and stress-free for the plants. Once your seedlings have grown sufficiently in the soil blocks, begin the process of hardening off, just as you would with seedlings started in traditional containers. Gradually introduce them to the outdoor conditions over a period of a week or so to acclimate them to the external environment.
When they are ready, transplant them directly into the garden soil. The beauty of soil blocks is that the entire block is planted into the ground, minimizing root disturbance. This makes the transition from the soil block to the garden soil seamless and significantly reduces transplant shock. This method not only streamlines the transplanting process but also promotes quicker establishment and healthier growth of the plants in their new environment.
Wrapping Up
If you found this guide How to Use Soil Blocks for Seed Starting helpful, don’t leave us a comment below, and follow our YouTube channel for more gardening tips.
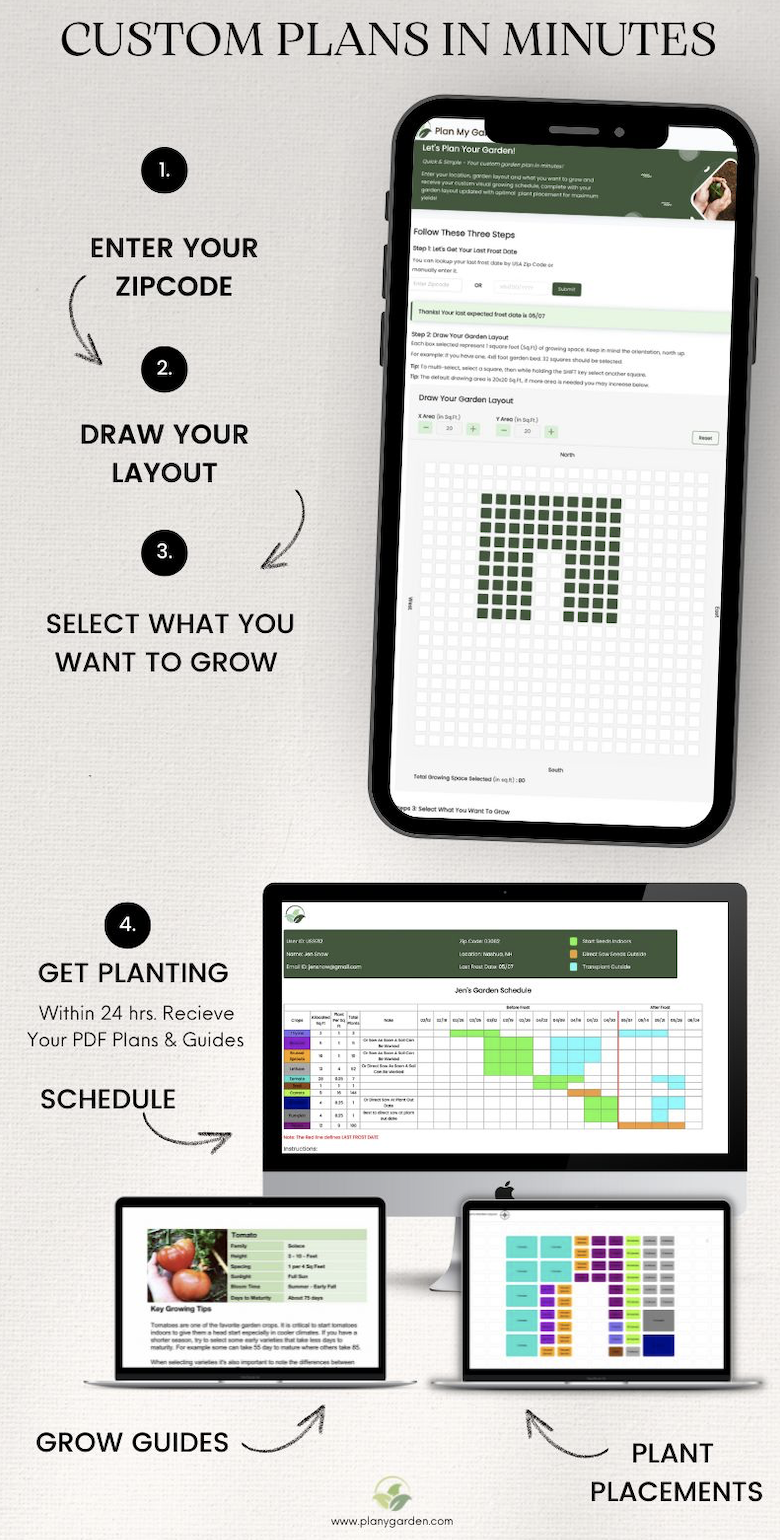
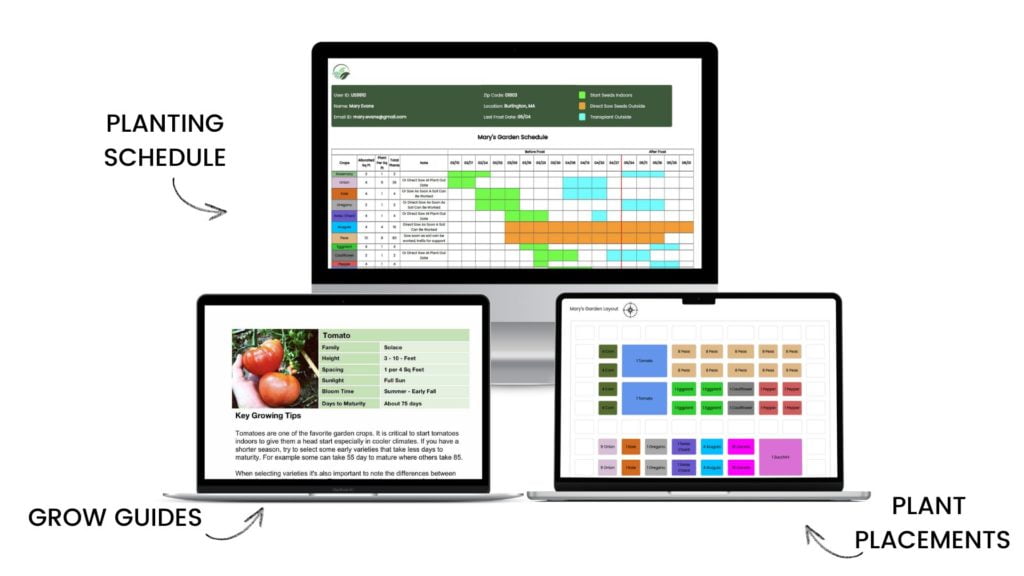
And for those planning their spring garden, check out PlanMyGarden, which makes garden planning simple. Enter your ZIP code, draw your garden layout, and select what vegetables to grow. We’ll send you a custom PDF with schedules, guides, and optimal plant placements for maximum yields.
Stay tuned for our next post, and happy gardening!